
Home | ECR Homepage
East Coast Reflector Newsletter - January 3, 2022
 MORNING BREW Q&A - By Michael K2SHF
Many thanks to all who checked in to the Morning Brew.
Last week we asked the following questions. As always, only answers with a tally of 2 or more were included below. A big thank you goes out to Derby Dan for tallying the results.
What do you do when you get a week off from work?
I'm Retired [12] - Take a Trip [13] - Relax [9] - Honey-Do List [3] - Ham Radio [4] - Fishing [2]
Christmas Trees... Artificial or Real?
Artificial [54] -- Real [10] -- No Tree [2]
What is on your New Years menu?
Pot Luck [26] - Ham [23] - Steak [7] - Pork [6] - Surf &Turf [2] - Pizza [2] - Meatloaf [2]
Hamburgers/Hot Dogs [2]
Do you have any New Years resolutions?
None [31] - Be Healthy [6] - Quit Tobacco [3] - Improve Self [2] - Eat Healthy [2]
HAPPY NEW YEAR!
From all of us here at the East Coast Reflector, may you have a happy, healthy, safe, fun, exciting, and prosperous new year. Out with 2021 - In with 2022!
MY QUIRKS - By Bob KB3SNM
There are many misunderstandings in the terms that are used on amateur radio. One of the things that is a quirk of mine is the use of the word channel when referring to the frequencies set in your radio. In CB radio there are designated channel frequencies; in marine radios there are designated channel frequencies, but in amateur radio the only place there is a channel is on your radio, it is not universal to all amateur radios. You are the person who sets the frequency, within the amateur radio band, that you’re dealing with. If I happen to have the same frequency and channel 1t is purely by accident. So when you refer to your channel 1 it really means nothing to anyone else.
ZOOM ROOM PRESENTATION
This Thursday, January 6th, Paul KB0p will be giving a presentation in the Zoom Room on Loop Antennas. A Q&A session will follow immediately after. You can access the Zoom Room at http://bit.ly/ecrdaily. Please join us!
 NEW LOW-POWER LIMIT FOR ARRL HF CONTESTS GOES INTO EFFECT ON JANUARY 1, 2022
Taken from The ARRL Letter dated December 30, 2021
ARRL has set a new standard for what counts as low power for ARRL-sponsored HF contests. The new limit is 100 W, which is down from the 150 W limit that has been permitted in some events, including the ARRL November Sweepstakes.
With the exception of ARRL Field Day, this change goes into effect on January 1, 2022, for all ARRL-sponsored HF contests, as well as the IARU HF World Championship.
This change has been implemented to standardize low-power categories within the contesting community. However, on a more practical level, the typical modern HF transceiver has a maximum power output of 100 W.
For more information, contact the ARRL Contests program. -- Thanks to The ARRL Contest Update
IN BRIEF - From The ARRL Letter dated December 30, 2021
1. NASA has announced its intent to purchase three more commercial crew missions from SpaceX -- in a sole-source award -- as a hedge against further delays in the certification of Boeing's CST-100 Starliner. Those missions will be in addition to the six post-certification missions SpaceX in 2014. "It's critical we begin to secure additional flights to the space station now so we are ready as these missions are needed to maintain a US presence on the station," said Kathy Lueders, Associate Administrator of NASA's Space Operations Mission Directorate.
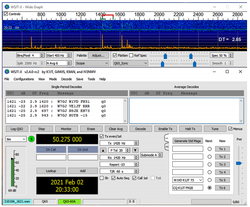 2.
A new release of WSJT-X is available. The WSJT-X development group --
Joe Taylor, K1JT; Steve Franke, K9AN; and new member Nico Palermo,
IV3NWV -- have announced the release of WSJT-X 2.5.3. This new release
includes a feature of special interest to users participating in the
ARRL January VHF Contest (January 15 - 17). This new feature is an
enhanced macro facility for text messages that is aimed at making it
easier to ask another station to move to another band. This feature is
described briefly in the updated WSJT-X User Guide. Installation packages for WSJT-X 2.5.3 are available on the WSJT-X website.
2.
A new release of WSJT-X is available. The WSJT-X development group --
Joe Taylor, K1JT; Steve Franke, K9AN; and new member Nico Palermo,
IV3NWV -- have announced the release of WSJT-X 2.5.3. This new release
includes a feature of special interest to users participating in the
ARRL January VHF Contest (January 15 - 17). This new feature is an
enhanced macro facility for text messages that is aimed at making it
easier to ask another station to move to another band. This feature is
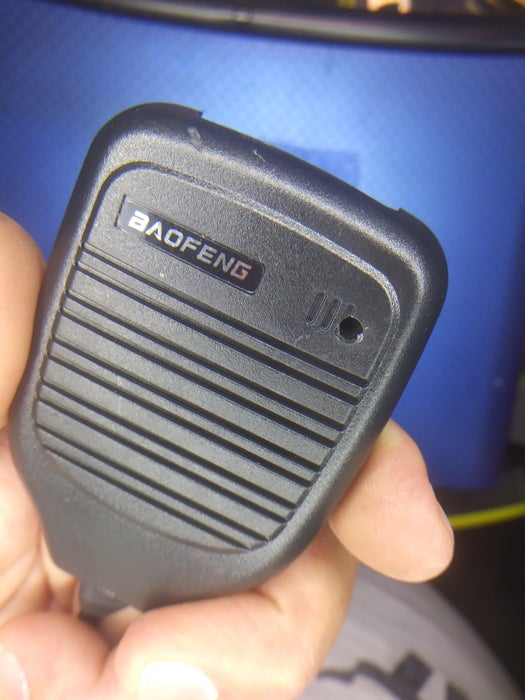
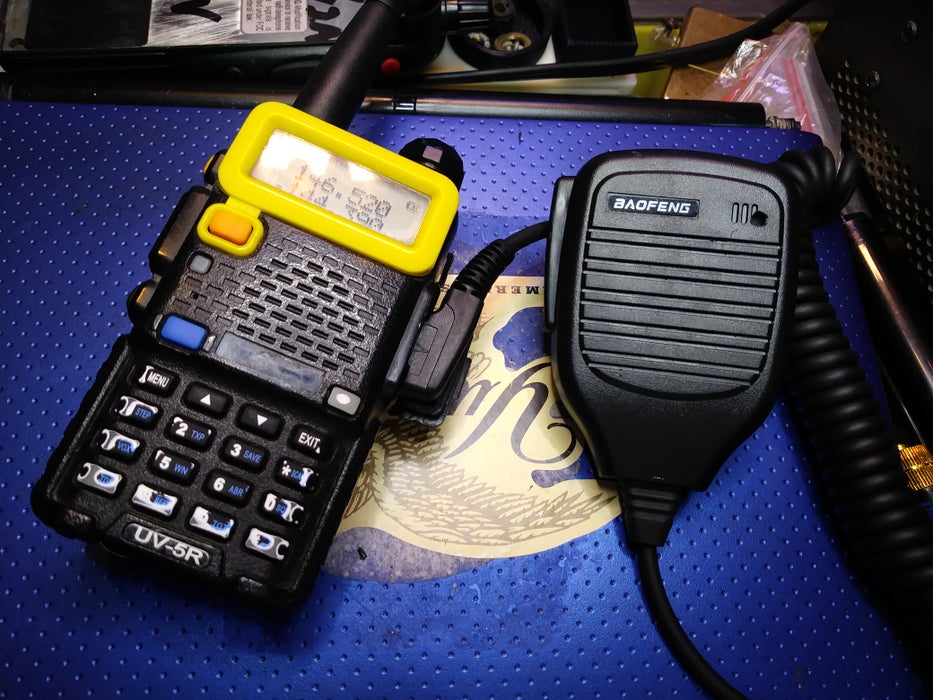
described briefly in the updated WSJT-X User Guide. Installation packages for WSJT-X 2.5.3 are available on the WSJT-X website.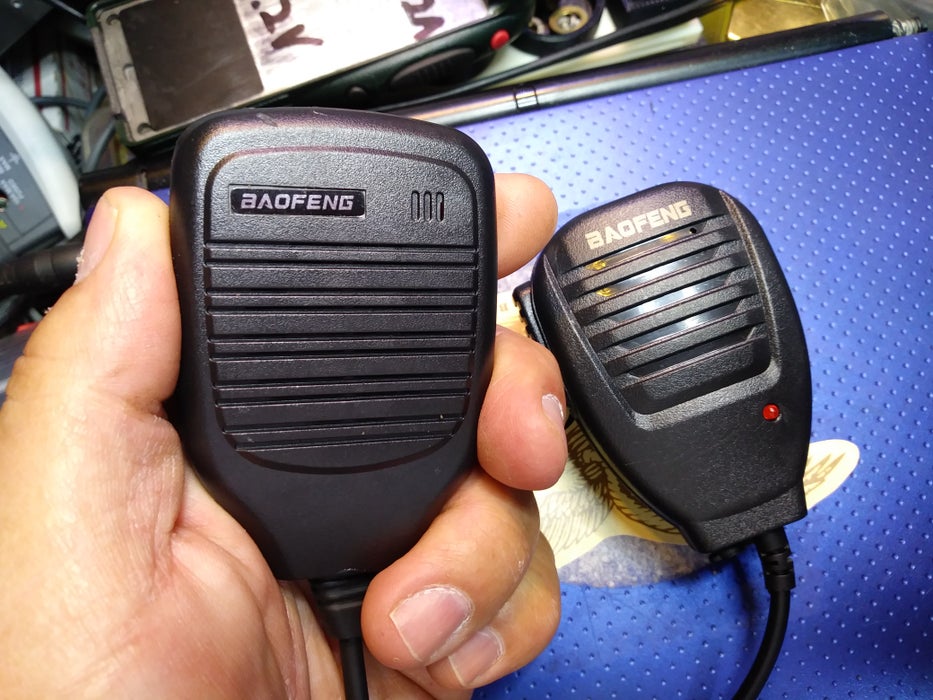 THE CHEAP HAM - FIXING THE BAOFENG HANDMIC'S LOUSY AUDIO
Taken from instructables.com by KE4MCL
Submitted to ECR by Charles KC6UFM
Chinese ham radios, you either love them or you hate them. Regardless of how you feel about them, there's never been a cheaper time to get into the hobby. Low priced Chinese gear has allowed even those on the tightest budgets to get on the VHF and UHF bands.
One of the more complained about Chinese radio items are the hand mics. The Baofeng / Pofung handheld radio mics are well known for lousy transmit audio. It varies from "pillow over mic" to "mic in cardboard box" type sound. At roughly $5-$7 a piece, it's hard to ignore them despite their shortcomings. Fortunately, it's not hard to fix this issue. In this instructable I will show you how to fix the lousy transmit audio problem that plagues many of these mics.
What's required to complete this task..
You must be able to solder small components. We're not talking surface mount small but small nonetheless. You must have basic hand tools and the dexterity to use them on small parts. A soldering iron with a small tip is a must. A de-soldering iron is quite helpful but you can get the task done without it.
 Step 1: Let's Dig In!
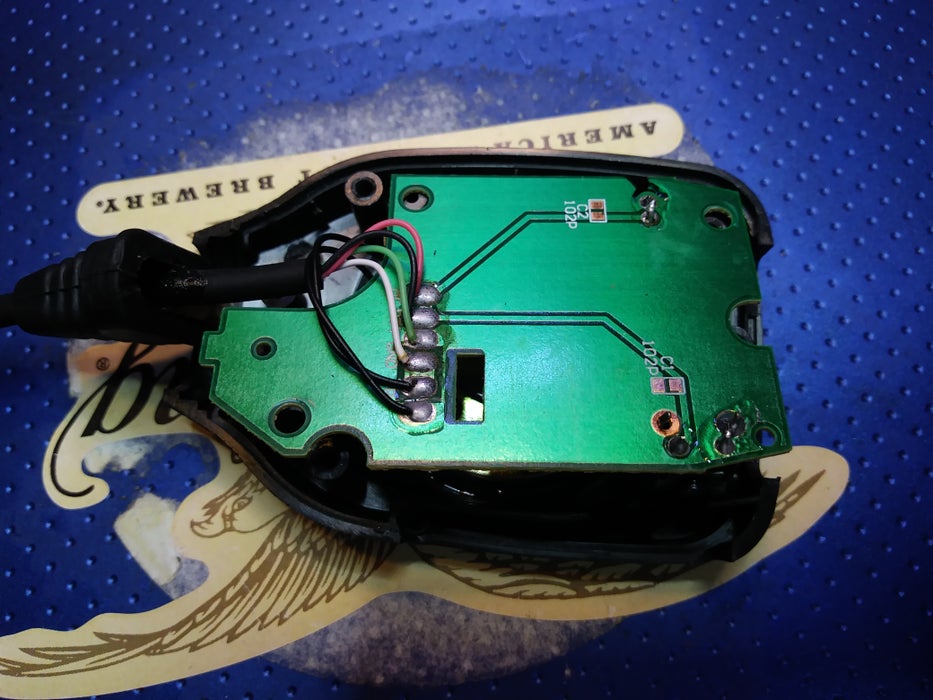
Start off by removing the philips head screws that hold the mic together. The mic shell should split open. When it opens, chances are you will have the PTT (Push To Talk) button fall out and maybe a plastic cover that covers an area for options the higher priced mics (which can also be plagued by the same lousy audio) have.
Don't fear, nothing broke. Everything has it's place in there and it's not hard to figure out. You will see a circuit board, remove the screws holding it in place.
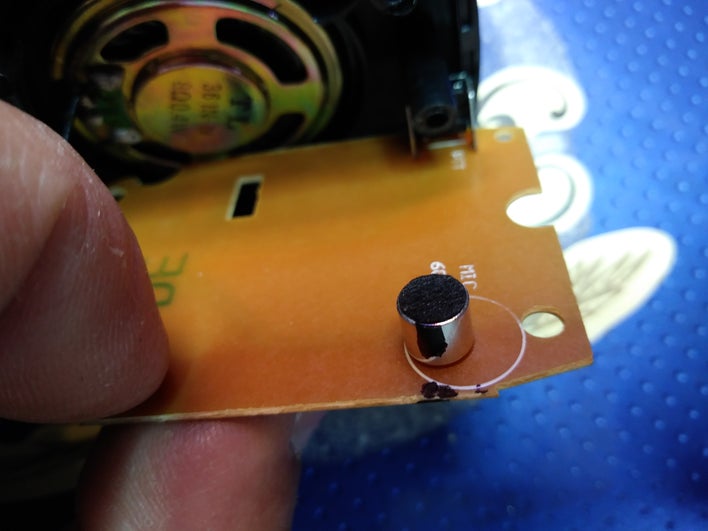 Step 2: Removing the Mic Element
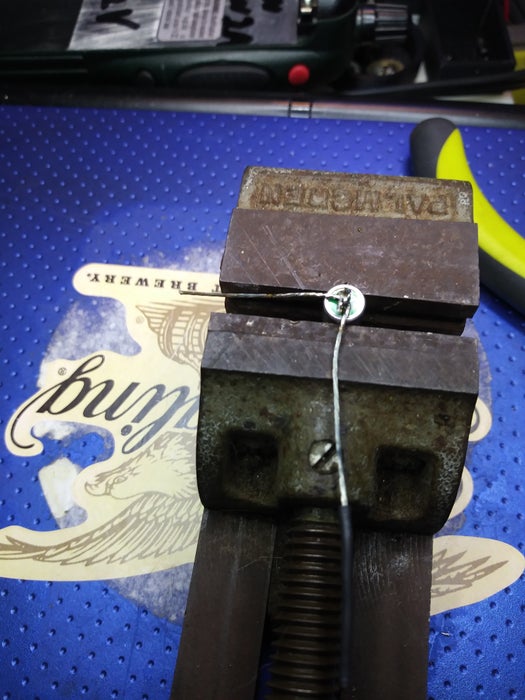
Once the screws are out that hold the board, flip it over. You will see a little round silver cylinder with a black felt cover on it's end (pic 1). That is the actual mic element. You will need to remove it from the board without breaking it.
I suggest you first mark it with a black marker so you don't flip it around and wire it in wrong. Once marked then you need to liberate it from the board. A de-soldering iron is the tool of choice here but if you don't have one, don't despair.
With patience, you can get a soldering iron in so it heats both legs of the mic element allowing you to quickly yank it off. Once out, reheat the solder pads one at a time. Once the solder is melted, stick an awl or icepick in the hole and let it cool. The holes are small so it needs to be sharp. When the solder cools you should be left with a small hole in which to insert a wire in.
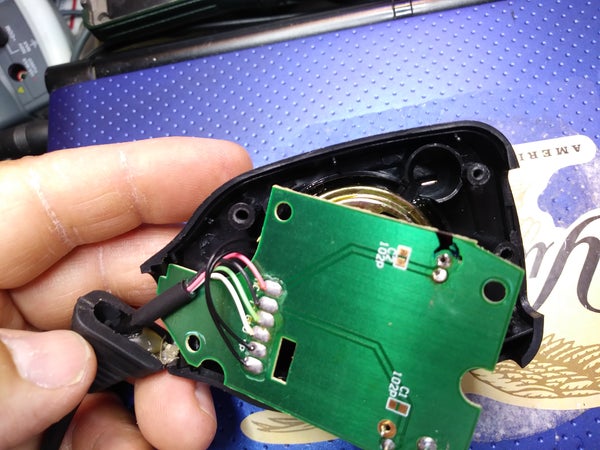
 Step 3: Prep the Mic Element for Re-install
One of the main reasons these mics tend to sound awful is the placement of the mic element itself. The mic element sits away from the face of the mic in a little tunnel. This creates some weird sound cancellations and gives them their signature muffled sound. By moving the mic element so it's flush with the face of the mic, the problem is fixed.
Here's were we test your dexterity. If you have shaky hands, you'll need help here. You will need to solder some short (aprox 1") bare wires to the mic element. I used striped alarm wire but anything will work as long as its somewhat stiff and thin enough to fit in the holes in the pc board. Probably the best candidate here is a solid copper strand stripped out of some cat 5 cable. The long leads will allow you to reposition the mic element to where it really needs to be.
Be careful when doing this that you don't overheat the mic element, thus killing it or that you don't short the leads when soldering. They are very close together. If you busted your mic element, don't fret. I have salvaged replacements from discarded office telephone handsets. They work just as well.
 Step 4: The Hole Some Manufacturers Forgot
Some of these early handmics don't have a hole at the mic element! The Chinese took quite a demoralizing tongue lashing for this on the radio forums and have since fixed the problem but it's still a bit on the tiny side.
In pic 1 you see the stock hole just above and to the right of the circuit board. It's a tiny slat. In pic two you see where I enlarged it using a drill bit that I just twisted by hand. Took all of a minute or two.
 Step 5: Install the Mic Element
Take the mic element you just installed the extended leads on and get the leads threaded into the holes on the board. Don't forget to orient the mic element the same way it came out. Place the board back onto the mic shell and carefully push the leads in until the mic element moves up against the face of the mic. You may have to peek in from the side to see what you're doing. Once you have moved the mic element in as far as it will go, put in the screws that hold the board in place and you're ready to solder.
A word about soldering on these boards....
It's a cheap mic sold at a cheap price. One of the cost cutting measures the Chinese have employed is extremely thin board traces (the copper connections on the board). They peel and break easily. Should you bugger up the traces on the board were the mic connects, dont despair. Just follow it up a little bit to where it's not broken, lightly sand or scrap away the green coating on the board till you see copper and solder to that point. You can see in pic 1 where I had to do that.
Once soldered in, flip the mic over and look in the hole you previously opened up with the drill bit. You should see felt from the face of the little mic element. If it's off center, you can reposition it with a small screwdriver by pushing lightly on the leads under the circuit board. Be careful not to bend them and short them out.
 Step 6: Test and Enjoy
Once soldered in you can test the mic before fully reassembling it. Test it. Make sure you have transmit and receive audio at the hand mic. No TX audio but radio keys, you may have shorted the mic element. No RX audio, make sure the speaker wires haven't broken off from all the movement while you worked on it. If all is well, reassemble.
Have fun with your great sounding $7 mic! It's always fun to catch the radio elite by surprise by asking for a signal report first and then telling them you're using a Baofeng with a handmic!
THE BAOFENG TACTICAL RADIO - By Caleb KO4UYJ
The new Baofeng AR-152 dual band “tactical” ham radio is said to produce 15 watts! Though the radio has not yet been released in the US, many hams have been able to get their hands on one of these. Multiple reviews have stated these dual band handhelds do not produce the power as advertised. Most hams that have reviewed these radios have stated that they are no more than a UV-5R in a more robust case. It does, however, have a battery with over 10,000 mAh capacity. Like most Baofengs, this radio is able to transmit outside of amateur bands. For those interested in the radio, it is available from a few Chinese websites, but it is unclear when it will be available in the US.
We need articles. If you see one, please send the URL to k2shf(at)arrl(dot)net. And better yet, if you feel like writing one, we'd be happy to publish it right here on the ECR Newsletter.
| FACILITATORS Dick WB2JPQ Henry WB4IVB Emil WA2UPK Bob KB3SNM Tony W2KJV Kevin VE3BZ Paul W4END David KB4FXC Kevin KE7K Joe KO4FRR Mike K2CMT Michael K2SHF Steven K2EJ Keynon KB5GLC |
ECR ACCESS IRLP 9050 AllStar 27339, 45192, 45225 Echolink 57780, 375103 DMR Brandmeister 3129973 DMR TGIF 9050 System Fusion 44444, 92805 DStar coming soon! HamShack Hotline 94049 NETS Tech Net Tuesdays 8PM ET/7PM CT Morning Brew Mon-Fri 7AM ET/6AM CT Amateur Radio Newsline Sundays 1PM ET/12PM CT |
WEBPAGE http://eastcoastreflector.com ZOOM ROOM Open 24/7. All are welcome! ID: 83929643320 Password: 193414 http://bit.ly/ecrdaily MERCH SHOP http://bit.ly/ecrshop TECH NET LOG http://bit.ly/ecrtechnet |
Copyright 2022 East Coast Reflector
All Rights Reserved
All Rights Reserved